Monday, 1 February 2021

Onion Bhaji


Indian food isn't part of French colonial heritage the way Vietnamese isn't a British thing. Each country, apparently, takes away a rich heritage of cooking as part of the spoils of colonial rule. For our family, curry is an inherited taste. We enjoy a good curry (usually home made) and I'm not too fussy what I'm currying. Lamb is probably my favourite, chicken more often, beef occasionally, but my recent discovery is veal. It is at its most tender when cooked long and slow in spices and I admit I prefer it curried rather than as blanquette, for instance. Also I love to experiment with spices and I have a Tupperware spice box that has taken on all the smells of exotic places. 

Yesterday I cooked the veal all afternoon on top of the woodburner, in a sauce of red & yellow peppers, onions, garlic, ginger and tomatoes, spiced with a Madras curry mix. One of the few things I miss about living outside the UK is being able to pop into Waitrose (or whatever) for a wide and exotic range of ready made accompaniaments for my curry. Naan bread, puppadums and onion bhajis in particular. Naan is simple enough once you've got the knack, puppadums must be deep fried (don't even suggest microwaving them), and onion bhaji can be home-made without much difficulty. In fact, I suggest using the same oil as for puppadums and make & fry them whilst the rice cooks. Home made are so simple and delicious that it probably wouldn't be worth buying them even if they were available. 

I'm not going to claim I've been making them for years, I just suffered without for too long and finally found Gram flour (the essential ingredient) in my local supermarket's Bio section. The first time I tried them to a traditional recipe they were lovely, but lacked crunch. Then a friend, who was out of Gram flour said he had used a combo of other flours and that they were lovely and crisp. So I had a good thinki about what it is I want from my bhajis. Firstly I love the flavour of Gram flour. Chick pea flour is what it is and it gives that earthy, nutty flavour. I want some crunch, but also a soft interior. This doesn't mean undercooked or doughy, just that the crunch shouldn't be everything. As for onions, use the ones you enjoy. I use a yellow onion for every day cooking and these worked perfectly. 

I spiced the bhajis - a teaspoon of turmeric, a teaspoon of curry powder, salt to taste, cumin, a little chilli powder for heat. Someone told me that their local restaurant adds fennel seeds and I'm looking forward to trying that.

I recommend Colza oil for fryng. The key quality of this oil is it can be heated to a high temperature without burning, I us 3-4 cms at the bottom of a deep pan


 So, to business. 

Ingredients

6 tablespoons Gram (chickpea) flour

2 tablespoons Self-raising flour

a glass of water (this isnt a precise measure - it is how much you need to have to hand)

I medium onion, cut into four and sliced thinly

seasoning

1/2 tspn salt

1 tspn turmeric

1 tspn curry powder (or garam marsala) 

1/2 tspn cumin

a pinch of hot chilli powder, to taste

other spices as you wish 

Method

Stir all the dry ingredients (flours, spices, seasoning) together.

Add sufficient water to make a fairly stiff dough, but not too dry.

Add the onions and stir in.

Fry

In hot oil for 3-4 minutes, turning half way through. I shape mine into rough patties and flatten them slightly. Turn out into a dish or basket lined with a paper napkin and serve with chutneys and sauces of your choice.


Monday, 16 November 2020

Autumn - Normandie Apple Cake

Normandy Apple Cake

You've heard of Dorset Apple cake, although a quick scan of my bookshelves reveals no unanimity regarding ingredients. However, this is one cake that I've researched thoroughly and tested for you and that we can definitely claim as our own in Normandie. It's only connection to Dorset is the germ of an idea. 
 
I wanted a recipe that would be easy to do - an all-in-one batter, no peeling of apples, and using local ingredients. Although walnut trees are common in this region I have no walnuts of my own and am deeply jealous of those who have. I regard them as absolutely essential to autumn baking. Many cakes suffer with dryness and that would never do for this, so I used Cidre Bouché Normande to ensure the batter has the softest of textures. 
 
The apples (a quintessentially Norman ingredient) are eating apples, red skinned, washed, DRIED, cored and diced. Dried because you don't want them to sink. Do it at the last minute so they don't brown and you won't then need lemon juice. (I diced mine whilst the batter was in the mixer). Don't peel them - they retain their texture (and add fibre and colour) better this way. This isn't the time for Bramleys - completely the wrong flavour and texture. I used a local eating apple, but failed to remember which variety.
 
Spices are my passion and in this case I've chosen the slightly exotic fragrance of Melange Pain d'Epices, that wonderful sweet bread so much part of Christmas festivities here and served with foie gras in particular. The brand i use (Eric Bur) includes the usual cinnamon, ginger, nutmeg, cloves, but also star anise, black pepper, cardamom, coriander. and sweet paprika. A much more complex range of flavours than UK mixed spice. 


Ingredients

230 g butter (very soft)
230 g Self-raising flour (farine a gateau)
1 tspn baking powder
230g soft light brown sugar (Sucre viergoise blonde)
4 eggs
pinch of salt
1 tspn Melange pain d'epices
100 ml cidre
4 eating apples washed, dried, cored and chopped into 1cm dice.
50g chopped walnuts. How finely is up to you.
 

Method

Preheat the oven to 160c. Prepare either a bundt tin (this quantity will not quite fill a standard NordicWare pan) or a round 20cm cake tin. Grease and flour well. (I didn't, I suffered),
 
Place the butter, flour, baking powder, sugar, eggs, salt and spice mix into the bowl of your stand mixer (or use a hand mixer). Beat for at least two minutes, adding cider until you have a soft dropping consistency.  Then add the prepared apples and walnuts. Spoon into your prepared pan and bake at 160c for one hour. Test at the end of cooking time to ensure there is no uncooked batter on your skewer. Allow to rest for 10 minutes before turning the cake out onto a rack to cool. 

Serve with the tea/coffee of your choice. In the morning it will be wonderful with a café au lait and reminds me of pumpkin spiced lattes grabbed on the way into work. 
 
You will notice I haven't posted a picture of the entire cake this time. I admit I failed to prep my tin sufficiently and it came out in two pieces. Not a disaster (except to the ego), but a warning to all. If I were using a round tin, I would bottom line with parchment. As it is I prefer a bundt tin for this recipe so will grease AND flour next time. There will be a next time!


Wednesday, 15 July 2020

Garlic Tear & Share Bread

Garlic Tear & Share Bread

 Bread is such a wonderful thing. From a sandwich to bread & butter pudding, so much from one relatively simple recipe. I make bread weekly. I've given up sourdough because much as i love it, the other member of the household doesn't and I don't eat vast quantities of bread anyway. Now I generally make a fairly pedestrian white loaf, with rolls, garlic bread or buns as an added extra. I made some cheesy tear & share bread a couple of weeks ago and it was very popular so here's the method. I won't say recipe, because this can be made with any bread mixture you prefer.


Take about 300g flour and make a plain white bread dough however you normally do it. Give it the first rise then knock it back. Next take 125g butter and melt it in a pan. Grate one or two cloves of garlic into it (depending how garlicky you like it) and season with salt & pepper. Stir the butter on the heat - don't so much cook the garlic as flavour the butter. Brush butter into a 20cm square pan. Now make 16 small balls out of your dough. Using a slotted spoon, roll each one in the melted butter and arrange them 4 x 4 in the pan. Any remaining butter & garlic mix should be poured over the top. Don't worry if it looks seriously overbuttered, any excess will be absorbed by the baking bread. Sprinkle liberally with up to 100g grated parmesan (or strong Cheddar, Cantal or Emmenthal) cheese. At this stage your doughballs will look a bit 'socially distanced' in the pan. Don't worry, the second rise will take care of that. You can either leave the pan in the warm for about an hour before baking, or (as I did prepping for a barbecue) you can put it in the fridge until  later in the day. In this case just take it out half an hour before you want to bake it. Pre-heat your oven to 180c and bake your bread for 30 minutes. It will be well risen and golden. 


Any leftovers can be frozen in foil for reheating another day. I freeze them in twos to add extra interest to pasta dishes. As you can see in the pictures above, I sometimes make a smaller quantity when I'm doing a weekly bake and use a smaller dish. This is a great way of serving bread with a meal and does an excellent job of soaking up the juices. I mentioned I'd used it at a barbecue and it is a delicious addition to grilled meat & salads.

Sunday, 5 July 2020

Brownies


I always want to go into raptures about American home baking, because it is something than America has always done so well. Cookies, biscuits, cakes, breads, there is a world of good baking which originates from America. Well, maybe not originates exactly because most of it has German, French, Scandinavian, Italian roots depending on where settler families set out from, but it has been perfected there. Some recipes, such as cornbread (there is nothing better with chili) owe a great debt to the lifesaving skills taught to the first settlers by Native Americans. But the quintessential American baking recipe is the brownie. 

I don't know why I haven't written this post before. Possibly because brownies are such a staple of the domestic cook's repertoire that I assumed everyone knew how to make them. It turns out they don't. Or, at least, not the way I do it. Which I'm going to be a bit snobby about because this recipe makes the best, squidgiest, chocolatiest brownies in the world. The origins of this recipe lie in the wonderful Sainsbury's recipe books of the 1980s. Written largely by Josceline Dimbleby, they featured heavily in my culinary education, being the books my mother always had to hand, along with the Dairy Book of Home Cooking and the Readers' Digest Cookery Year. I still have half a dozen on my shelves, although SOMEONE ELSE HAS THE ONE ABOUT AMERICAN BAKING, which is where this recipe originates.


The secret of this recipe isn't in the ingredients, which are simple enough, but in the method. Take the butter and melt it gently with the cocoa. it doesn't need melted chocolate of anything else, but melting the butter and cocoa together releases the chocolatiness of the cocoa in a way nothing else will match. The other secret is whisking the eggs and sugar together until they are light, fluffy and doubled in volume. This process also melts the sugar slightly (friction) so that you get that illusive crispy crust on top. Take your time. Don't hurry this recipe (although if you have to...). Allow time for the melting to happen and then to begin to cool. Then allow time for the eggs and sugar to achieve fluffy lightness. Then add flour. That is all. How much flour depends on what you're adding to your brownes. If chocolate chips and nuts, then only fifty grams to get stickiness and moisture in the finished brownie. If, however, you're going for the midsummer gloriousness of Black Forest brownies, then 100g will give more body to support the moist fruit.

Ingredients

250g unsalted butter
100g cocoa
a teaspoon of vanilla or almond essence (the good stuff) if you wish

200g caster sugar
3 eggs

50g (to 100g) Self Raising flour (or plain with your usual baking powder amount). Extra flour will make a slightly firmer brownie and this will better support fresh fruit.

50g walnuts, pecans or whatever you enjoy
50g chocolate chips which could be plain, milk, white or a mixture
or 100g chocolate chips if you're making them for my children

or

a generous mugful of washed, stoned, halved cherries

Method

Preheat your oven to 180c.  Prepare a pan, with oil & flour if needed. Mine is a 20cm silicone with a metal frame for convenience and has the advantage of not needing much prep.

Melt the butter and cocoa together in a pan, stirring until perfectly smooth. I don't use the mircrowave for this - there is too much danger of overheating and irretrievable lumpiness. Leave the mixture to one side to cool a little. You can add any flavourings you like at this stage. a teaspoon of vanilla extract, or almond if you're using cherries.

Whisk the sugar and eggs together until well risen and light.

Gently fold the chocolate mix into the eggs & sugar until completely combined. Then fold the flour in, gently but firmly until smooth. Add nuts, chocolate, or cherries.

Bake for 30 minutes until it is cooked at the edges and still a bit sticky in the centre. Then cool before cutting into squares. I find this amount makes sixteen perfectly sized brownies. My only decoration for these is a sifting of icing sugar.

You can very easily double this recipe to feed a crowd, using a larger square or oblong pan.

.


Tuesday, 12 February 2019

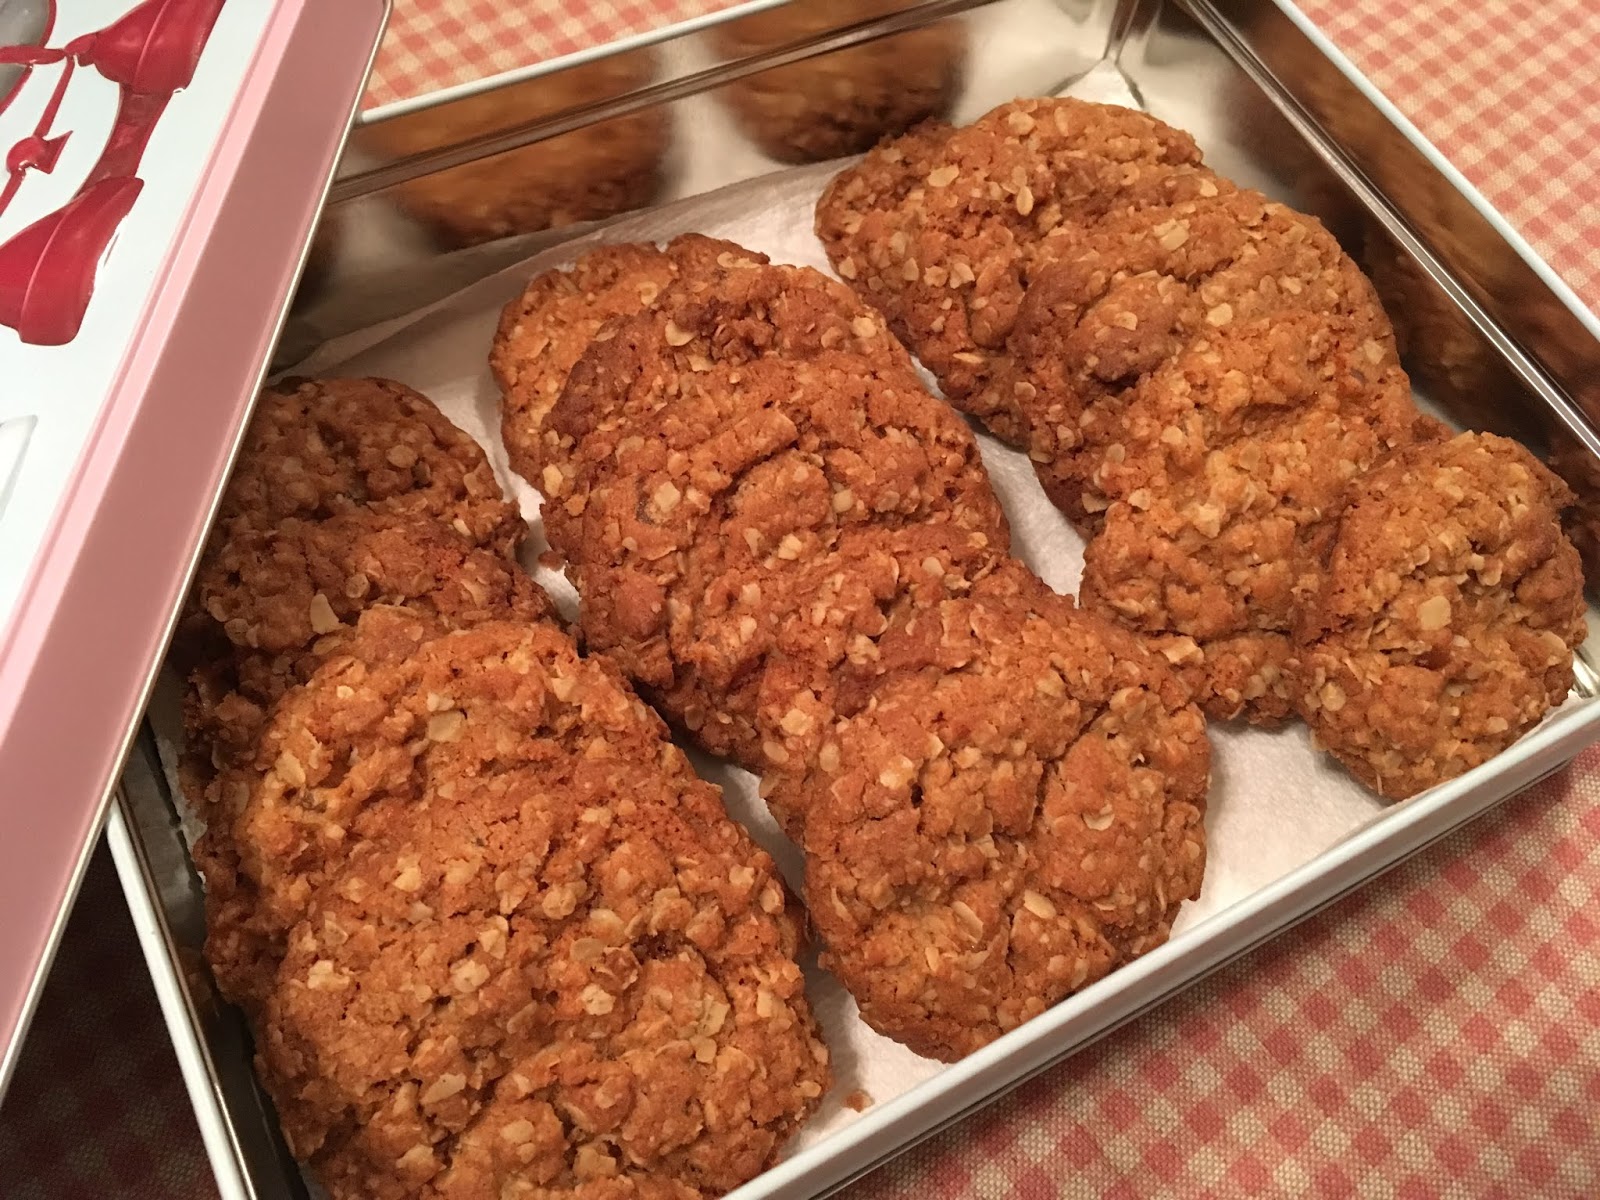
Ginger HobNobs

Ginger HobNobs

Yes, I took a break from food blogging. I'm not sorry. The nightmare that is Brexit required attention. It still does, although whilst not resigned to it I am now turning attention to other things. If you voted for this mess you need to go sort it out.

So, February in Normandy can be cold and miserable. This year it is cold, but brighter and all the better for it. However February inevitably means afternoons in front of the woodburner and tea is just too wet on its own. So home made biscuits are the best solution.

I'm sure someone. somewhere (probably a biscuit manufacturer) will have a problem with my name for these biscuits. However, old habits die hard and this name describes them precisely. They have the texture, crumbliness and oatiness of the manufactured version, but with a delicious buttery flavour, wholesome ingredients, no palm oil and the extra bonus of chewy, zingy ginger loveliness. The name is the only thing this takes from the factory - the rest is memories of my mum and her lesson on biscuits. "there are two sorts of biscuits, rubbed in like shortbread and melted". These are melted biscuits, par excellence. 

At home they were most often made lightly spiced, with some dried fruit in. The basic recipe for these is your launchpad, from where you can let your imagination run riot. One day I'm going to flavour with orange zest and add cranberries and white chocolate. You can, of course, make them with chocolate chips, but you'll need to add a spoonful of milk and let the dough cool a bit first.

I try to stick to ingredients that are easy to find, especially here in France. Although the recipe calls for golden syrup, I know that can be a bit hard to get, so can be simply replaced with maple syrup. It doesn't have a strong flavour, but lends the same stickiness to the finished biscuit. Also, happily, it goes perfectly with pecans, which can either be added to the mixture, chopped or (as I have myself) added to the top of the biscuit before baking. 

The other 'hard to get' ingredient in today's version is, of course, stem ginger.  I have no suggestions if you haven't got any; make maple pecan, or a plain version. Or flavour with ground ginger and mourn the loss! Sorry. 

Either way, these are quick and satisfying to bake. The preparation is just a few minutes weighing, melting, weighing and mixing. You can fancy up the end product with a little plain chocolate drizzled on top, or serve them as they are. All that is needed is a nice cup of tea to go with them. I heartily recommend Cardew's Oxford Afternoon. Not because they are paying me (if only!), but because it is my own favourite afternoon treat. 


So, to business.

Recipe

Preheat your fan oven to 170c (180c for a static oven).

Prepare a couple of baking sheets with baking parchment.

Weigh into a pan

140g sugar (white or golden caster sugar)
140g unsalted butter
1Tblspn golden syrup

Melt these together, just until the butter is melted. Don't let it get too hot. Remove from the heat to cool.

Then weigh into a bowl

140g self raising flour
1tspn bicarbonate of soda
110g porridge oats
60g finely chopped preserved stem ginger
2tspn ground ginger (to taste)

Gently mix the dry ingredients together. Add the melted ingredients, which should have cooled a little. Mix gently until the ginger is evenly distributed and the mixture is blended. Measure your biscuits onto the baking sheet.

I find a 1tablespoon coffee scoop is perfect to measure these. Don't pack the mixture in, though, because they can move from crisp to hard quite easily. Just fill the scoop naturally.

I generally find I get 24 biscuits - 12 to a baking sheet.

Bake for around 25 minutes. Keep an eye on them for the last few minutes. The extra sugar from the preserved ginger means they brown a little more than you might expect.

Serve with your favourite cup of tea.

As I mentioned above, these biscuits can be flavoured with other spices, dried fruit, nuts, a teaspoon of vanilla, chocolate chips or whatever your heart desires. If you do choose to use chocolate chips, let the melted mixture cool a little more and add a tablespoon of milk to it, adding the chocolate chips just before you bake the biscuits. The extra liquid (only a tablespoon) will allow for any extra absorption of the melted mixture while you are waiting for the mixture to be cool enough to add the chocolate. If the mixture is too dry, the result will be a little too crumbly.


Saturday, 28 November 2015

Sourdough

I've had a bee in my bonnet about bread for some time now. I hate, loathe and detest bad bread. In France we are lucky enough to be able to get good, fresh, crispy bread whenever we like. However, our local bakery recently closed and although crispy is great, sometimes you need something with a bit more substance. I like my bread to be a bit chewy,  have a good crust, maybe a little sourness to balance the sweetness as the carbohydrates turn to sugar in your mouth. You can see where this is going...bread that we call 'pain à l'ancienne' in France, and is called sourdough in America.


This is essentially bread that is risen without the aid of added baker's yeast. You grown your own yeast in a culture made of flour and water. Some articles I've read claim that the yeasts come from the atmosphere. I don't think this is true; my own experience is that the naturally occurring yeasts in the flour are the basis of your culture. The flour that you use will define the flavour of your bread. I use rye flour - organic if I can get it. This is because rye flour seems to have plenty of yeast in it and the resulting mixture (the starter) is lively, bubbly and smells delicious. The bread it makes is slightly beige in colour, has a good crusty texture with big bubbles inside. Best of all it is very cheap to make; flour, water, salt.


You start with a clean jar - I use a 1 litre 'Parfait' jar with a rubber seal, and a measuring cup. I use about a quarter of a US cup (from the set of cup measures that you undoubtedly possess). Put a quarter cup of flour and a quarter cup of cold water into your jar. Mix it and leave it at room temperature for about 12 hours. Then add another measure of water and flour and leave it again. Don't seal the jar, just cover it with a tea towel to stop nasties getting in. Don't worry about putting it somewhere too warm either - normal household temperatures are fine, just try & keep it out of a draft.

Keep doing this (feeding it) for several days. Once your jar is more than half full, and before you feed again, discard about half your mixture. After a few (or several) days you will notice that the mixture becomes bubbly and starts to rise up the jar. This is great; the yeasts are multiplying. At this point you should start to get a lovely beery, yeasty smell. It should smell good - if it smells chemically or nasty, throw it away and start again. I have to say that I've never had this happen, but I've read about it!

Once your starter is rising up the jar after each feeding and looks bubbly and lively, you could try making a loaf with it. Best to start in the morning. Take about 500g bread flour, a couple of teaspoons of salt and about 200g of your starter. Add enough tepid water to make a slightly less than firm dough. You don't want it too sticky (or it might now be able to support itself), but neither do you want it dry. If you've made bread before you'll know what I mean and if you haven't then you will learn by experience. Knead the dough thoroughly for about 10 minutes, or five minutes in your mixer with the dough hook. I once read that bread dough should have the feel of a woman's breast. This might be of some help; it depends on the woman!

Leave your dough in a covered bowl to rise. You are aiming for the dough to double in size. If you started this in the morning, look at baking in the afternoon. Or, make your dough in the evening, let it rise in a cooler place overnight and bake in the morning. Once the dough is risen, shape it into a loaf, two smaller loaves, or a loaf and some rolls. Let the shaped dough rise again (probably about an hour or so) and bake in a hot oven for about 30 minutes for the smaller loaves or 45 for a large one. When your bread is done, knock on the bottom and it will have a hollow sound. Leave the loaf to cool on a rack. Voila - you've made your first loaf.

Now, you probably won't bake the perfect loaf the first time you try. If your dough doesn't rise too much, make pizza with it. If your loaf is a little solid the first time, try a softer dough next time. But don't be disappointed. It can take a few weeks before your starter reaches full potential. Play with the amounts and use your dough to make whatever bread you like. I usually make a white sourdough with wheat bread flour. Equally I could add wholemeal wheat flour (about 50/50 white & wholemeal makes a nicely textured loaf), I could use a proportion of rye flour or (my favourite) granary flour. 

This week I made a big batch of dough (about 1000g flour) and used about 500g of starter to raise it with a tablespoon of salt and (I think) 300ml water. I let it do the first rise for about six hours near the fire. I made two 400g loaves, a 400g baguette and five small rolls in the evening. We had the rolls with home made soup, the baguette yesterday and the two loaves are in the freezer for when we need them. Your bread will be equally good, whether you serve it with soup, with cheese & ham, or (as we we did last night) with baked beans and Ikea meatballs!

Once your starter is thriving and you've made a few loaves with it, you can be more flexible. I made bread early this week, then emptied the remaining starter into a bowl, cleaned my jar, fed my starter again and put it back. Then I closed up the jar and popped it in the fridge. The next time I need to make bread (in a couple of weeks, probably) I will get my jar out of the fridge, feed it at room temperature twice a day for a few days and then be ready to make bread again. It really is that easy.

Tuesday, 10 November 2015

Sausages, bacon, pork and ham. Oh, what a lucky wolf I am...

For anyone who doesn't recognise the quote, Roald Dahl's 'Revolting Rhymes' (and especially the audio version by Prunella Scales & Timothy West) is the best ever retelling of classic fairy tales. Supreme comedy without the faintest trace of bad language. Perfect for children because it doesn't speak down to them, but encourages their sense of the ridiculous and emphasises the absurdity of tales they are told by adults. That particular line from The Three Little Pigs always springs to mind when I'm cooking anything with pork ('The animal I really dig above all others is the pig...') Today's lunch is pig at it's finest; bacon chops prepared by the monks at Bricquebec, on the Cotentin peninsular not far from us. 

The starting point for this meal is actually a bowl of leftover potato & celeriac mash. You can use any potato mash, though - the celeriac flavour doesn't really make a huge impression here. I remember making potato cakes with my mum - they were cakes, not pancakes, more like a scone. Thick, savoury and fried in bacon fat. I'm on a bit of a leftovers kick anyway - there are few leftovers that can't be either turned into soup, eaten for supper, added to tomorrow's dinner or composted. Stale bread can be turned into breadcrumbs, Husband loves a little leftover mash in a bowl of soup, buy a cauliflower, make four portions of gratin and freeze three of them, make a big casserole and freeze two meals worth. Plan not to have leftovers - plan to use every bit of food you buy. 

Potato cakes are quick and simple. Take a bowl (about 250g) of leftover mash. Add a cup of self-raising flour (for lightness), 2 eggs, 50g of grated cheese (if you have it), salt & pepper to taste.

Combine the ingredients in a bowl. Add extra flour if needed to get a soft dough consistency. Turn out onto a heavily floured board. Sprinkle more flour on top. Shape into a 1½ cm thick cake. Cut into six sections.


Fry the cakes in oil (or whatever you prefer) until they are slightly puffy and golden, about 3-5 minutes on each side. My preferred choice of frying medium on this occasion was the juices from the bacon chops, plus a little duck fat. Served with mushrooms and a blob of ketchup, this isn't fine dining. However it is very satisfying home cooking. 


And as for the pig? Well, you might ask Red Riding Hood exactly where she acquired her pigskin travelling case.